Agent 47 will go slow and easy in killing his targets as Hitman 3 releases the Act 3: Sloth for their Seven Deadly Sins downloadable content (DLC) expansion pack.
After the success of its first two acts, Act 1: Greed and Act 2: Pride, Act 3: Sloth will have its players dive deep into the mind of Agent 47, while clearing new Escalation Contracts along the way in a new location of Dartmoor.
According to GeekTyrant.com, aside from the new content, players will receive a new The Lotophage suit as well as The Slapdash SMG and The Goldbrick Proximity Mine.
Also, according to TheXBoxHub.com, expect that expansion pack will completed with the other Deadly Sins.
How to Accomplish the Sloth Depletion Escalation - Level 1
Including in the Act 3: Sloth package is a new set of Escalation Contracts that set place in Dartmoor. As the name of the expansion pack says, you need to take it "nice and slow" in terms of eliminating your targets until you accomplish the "Silent Assassin" rating.
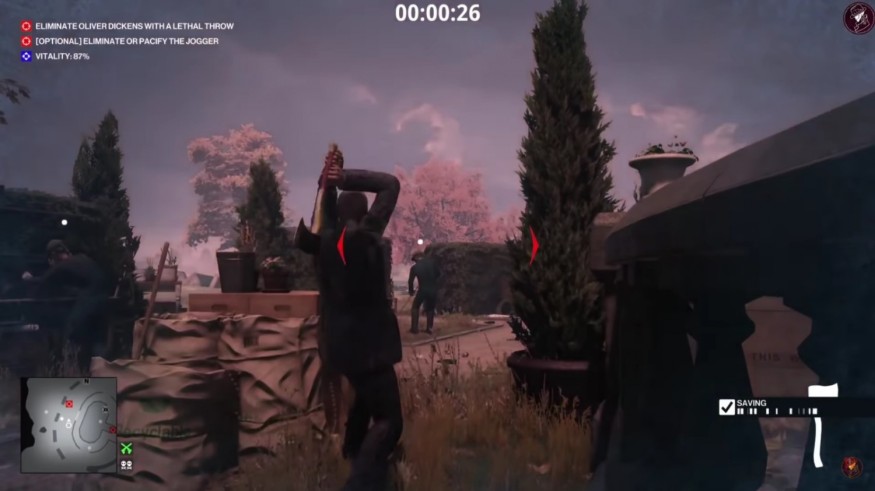
According to a guide by GamePur.com, another thing that you need to watch out during the Escalation is the "Vitality" meter bar that appears on the top-left corner of your screen. The said bar will slowly deplete everytime Agent 47 is moving or performing an action. The mission is over if the bar reaches zero.
With this fact alone, you need to execute your contracts as swift as possible.
The Sloth Depletion Escalation Contracts has three levels. In the first Level, you need to not only kill your target, but also you need to keep your starting disguise at all times.
From your starting location, you can go right around the wall and hide in the bushes next to the opening to the ruin. From your hiding place, you will spot a gardener that is coming out of the ruins. Wait for the gardener to move off to the right.
Once he moved to the right, run towards the snail statue. From there, you pick up the shuriken, then take a brick from the wall to your right. You can turn around and into the ruin before approaching the radio that is on the opposite side of the area to the snail statue.
Turn on the radio, and wait for it to trigger the gardener. Turn the radio off, hide in the bush, and wait. Once the gardener approaches the radio to turn it off, throw the shuriken at his head.
After you killed the gardener, retrieve the shuriken from the corpse's head and go towards the opening behind you.
Your next target is ahead of you. Throw the shuriken at his head to kill him. Now turn left and run to the guard by the trees. Throw the brick at his head to subdue him, then take the shuriken from the second victim and hide the body in the bushes behind him.
Run back towards the guard that you subdued and drag his body in either the nearby bushes or behind the wall if you want save as much vitality as possible.
Once you see the undertaker walking up to the gravesite, you can vault up and work towards the pedestal then take the screwdriver from it. Next, you need to move away to the right, all away out of the area, to the very edge.
You need to be cautious about a gardener that is sweeping in the area. Once they are looking away, pierce the barrel with the screwdriver. This will set a trap for the undertaker.
If the undertaker is not dead yet, run towards the bushes near the chair. If it is dead, you can run towards the exit. Kill the final target, then exit the level. Remember that you can kill a jogger to replenish your vitality bar.
How to Accomplish the Sloth Depletion Escalation - Level 2
In Level 2, your objectives will be much the same, however you will spawned in a different starting point, which is the bottom of the maze in the garden. Run ahead from your starting location and head towards a wooden stump with an axe in it.
Pick up the said axe, then move towards the boxes behind the gardeners at the back of the conservatory. From there, you kill the gardener that is furthest away from you by throwing the axe on him. You must need to wait until his back was turned.
Leave the axe and run past the corpse around the hedges. You'll see two snail statues ahead of you. Take the opening in the hedges to your right and turn on the faucet, which is located beside a stack of boxes. This will create a puddle at the bottom of the steps.
In the meantime, walk across the steps, the to the other side. Your second target will hear the noise coming from the faucet and will approach it to investigate. Then go straight to the gap in the hedge near the container.
Wait for the guard near the snail statues to walk away, then run towards a car battery. Grab it the throw it into the puddle, where your target will be electrocuted in the matter of minutes once they step into it.
After that, run to your left and work your way out of the maze, then run left to the fountain. From there, you can see the third target. Grab the screwdriver from the nearby boxes, then follow the target. You will see a staff member nearby.
Torn on the radio that is nearby to distract them out, then push the target into the pond once they are not looking.
Next, go to the house where your final target is there. Run up there along the maze's edge, then get up the steps and pick up the garden from the table. Next, pick up the tranquilizer gun from the snail statue while you are on your way up the stairs.
Wait until the target is approaching a window then cleans it. If she does, kill her with the fork, then leave the body. Like Level 1, you can kill the jogger to replenish your vitality bar by throwing the screwdriver that you picked up.
How to Accomplish the Sloth Depletion Escalation - Level 3
In Level 3, you must first eliminate Mr. Fernsby, who requires to be killed by an accident. From your starting point, head right through the open doorway, then pick up the letter opener on your right as you go through the house.
Put the letter opener away, then keep running towards a snail statue. From there, you can see that there is a lock pick as well as a cane by the table nearby. Pick these two items up, then run back towards the open window.
You must first open a secret door in the wall on your right with the help of the cane that you have acquired. Go through that secret door, then head towards the next room. From there, head out towards the door to your right, across the hall, and into the opposite room. You can see a secret door in that room.
Lift a book on the bookcase to activate said secret door, then enter to get through toward the exist of the said room. As you exit the room, you can able to see a colossal chandelier in front of you. Crouch, then head left, then get past through the guard to an another snail statue.
Take the SMG from the statue, then follow the guard. Knock him out, then get outside towards the next statue, where you can pick up a sniper rifle.
Wait for Mr. Fernsby to be in place below the chandelier. When he stopped walking, shoot the connecting wire that holds the chandelier, dropping it towards Mr. Fernsby, which instantly kills him. Now shoot another chandelier that is closest to you. This chandelier will drop to your second target, killing it in the process.
Run back towards the entrance of the area to pick up the letter opener that you've left and into the bedroom using the secret passage. From there, you can see your third target, where you can push him out of the window.
Then head out of the bedroom door and pick up the feather duster on your right. Go forward, and through the wooden staircase as fast as you can to avoid the guards. Go all the way up, and enter a trashed bedroom.
Wait for the housekeeper to look away from the door, then throw the feather duster at his head. You will see your next target to your left, which is a female housekeeper. Kill her by throwing the letter opener to her from a distance.
Next, you run towards an office where your next target is there. Get inside, then get behind the counter while avoiding the guard at the front of the room. From there, you could see the target, but don't him out yet. Instead, go out through the left door to the balcony.
Wait for the guard to walk away, then grab the shears that is behind you. Work your way around the front of the balcony, then drop the sniper rifle on the floor. Wait until a guard picks it up and takes it away. Take note that before this, you need to use it in killing a jogger to replenish your vitality bar.
Once the guard walked away, drop a pistol on the floor to draw your target out of the edge of the balcony. Eliminate the target by either pushing him over the ledge or subdue him then throw his body over.
With that, you conclude the "Sloth Depletion" Escalation Contracts. With these, you may get the "Silent Assassin" Rating.
Hitman 3 and its "Seven Deadly Sins" Expansion Set, including the "Act 3: Sloth," is available for PlayStation 4, PlayStation 5, Xbox One, Xbox Series X|S, Google Stadia, Nintendo Switch, and PC.
READ ALSO: Dead by Deadlight-Resident Evil Crossover Guide: How to Play as Jill, Leon, and Nemesis


