In Tank Mechanic Simulator, players will be given an opportunity to repair and restore classic Soviet, German, and American tanks, armored vehicles, and self-propelled guns that were used during the World War II, using parts for their engine, body, and turret.
These tanks can be seen in either the Scrapyard or just buried under the ground, which they can excavate using special tools. Once they finish restoring it, the tank can either be sold for additional profit for future builds or kept for their own war museum.
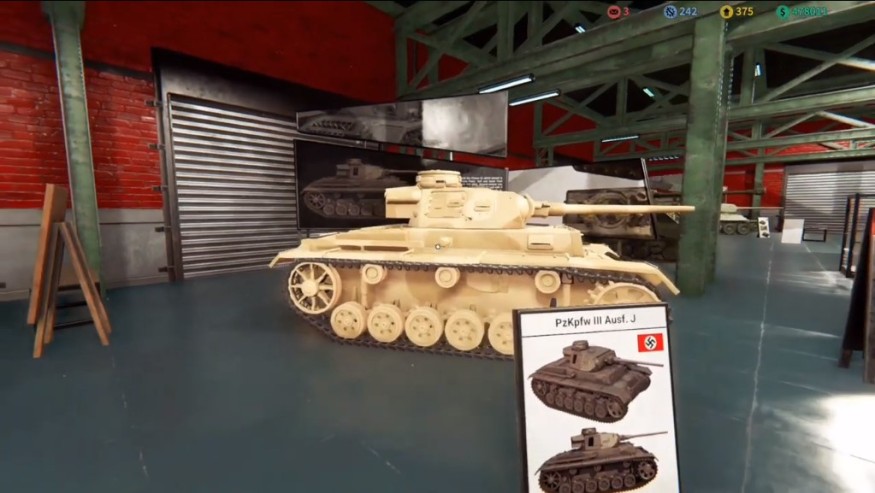
One of the tanks that players wanted to own in the game is the Panzer III Ausf. J, the most common variant of the Panzer III line of German tanks that were deployed during World War II. The said tank, which was produced between 1941 and 1942 served the war theaters of North Africa as part of Erwin Rommel's campaign, and in the Eastern Front.
How to Restore the Panzer III Ausf. J
In order to restore the Panzer III Ausf. J, players must first look for it. As mentioned earlier, tanks such as the Panzer III Ausf. J can either be found in the Scrapyard or buried under the ground, which is the case in the YouTube video made by WarGamesComedy.
To find the tank that is buried underground, they must have the tools for the said job. First, they need to use the metal detector to search any metal objects that are on the ground, if any. They can also use the drone that also has a metal detector installed in order for them to search for said tanks while on the distance.
Once they see a big metal object in their monitor screen, they can now excavate the said area, which will cost them money. Once the excavation is done, they can click the pump motor to clear out the mud in the area that was dug.
Once they see the tank, they will slowly clean it using the pressure washer to remove the excess mud and dirt. They can excavate the said tank out of the ground then transport it to their garage.
Once the tank is in the garage, they can now start the restoration process. They must first remove the engine, then the turret. They can also remove the tank's other parts such as the wheels, suspension, interior such as the seats, and internal controls.
After disassembling the said parts, they may proceed in removing the rust surrounding the tank. To do this, they need to select the Rust Removal Tool in their Tool Belt menu.
After that, they will press or click the button while holding the rust removal tool and hold it until the rust is slowly gone. They can also do this in the inside of the tank, as well as to its whole turret and engine block.
Afterwards, they can proceed to sandblast the remaining rust that was still on the tank. Much like the rust removal tool, they need to select the Sandblasting Tool in their Tool Belt, thenpress or click the button in order to start the sandblaster.
After sandblasting the tank, players can now prime the tank using the paintgun filled with anti-rust primer, followed by a fresh coat of paint.
Next, they need to repair every part that needs repairing, including the engine. They can check status of the said part by looking at their "color" in the Disassembly Mode.
If it is either green or yellow, that means that the part is either in good condition or needs minor repair. If it is red, that means they need to be replaced with new parts.
If they see all of the parts of the tank's engine intact and still good for use after removing the rust, they will not need to buy any parts, unless some of them are impossible to repair and they need to buy a new one.
Once they are done repairing and restoring the parts, they can now reassemble the tank, including its roller wheels, suspension, tracks, the gun barrels for the turret, and other parts.
Once they have done reassembling, they may now replace its oil, fuel, and coolant. Afterwards, they can put their newly restored Panzer III Ausf. J for a test run, fire its gun barrels, and display it in their own museum.


